Visuals
Visual Mastery: How We Generate Studio-Quality Product Shots Without a Studio
Good product visuals used to be locked behind budget. The new skill is not access, it is direction.
Let us talk about the thing that kills most small Indian product businesses before they even launch.
Not the product. Not the pricing. Not the supply chain.
The photos.
You have seen it happen. A genuinely good product - well-made, well-priced, actually useful - sitting on a grimy table under a tubelight, photographed in portrait mode on someone’s two-year-old phone. The listing gets zero clicks. Not because the product is bad. Because it looks bad, and in ecommerce, looking bad is often the same thing as being ignored.
We almost made this exact mistake with Stashed.
Why Product Photography Becomes the First Blocker
Here is the economics. A half-decent product photographer in any Indian city charges real money. A fashion or lifestyle photographer who can do brand-level shots costs more. Add studio rental, props, and models, and the early budget starts bleeding fast.
For a brand that has not sold a single unit yet, that is a brutal ask.
So what happens?
- You spend the money and hope it works.
- You take bad photos yourself and launch looking like a side project.
- You do not launch at all because it “does not look ready.”
Option 3 is more common than anyone admits. We know because we nearly did it.
We had Stashed ready - the design, the removable front panel concept, the first sample bags - but we had barely started manufacturing. We had almost nothing polished enough to photograph. We still needed to test demand, build a waitlist, and start talking about the brand.
That was when we went deep on visual generation.
Why Structured Product Visuals Matter More Than “AI Art”
For product work, the goal is not to make something dreamy. The goal is to make something believable.
When you need a specific bag, in a specific colorway, with specific material texture and hardware detail, you do not want the model inventing its own interpretation. You want control.
That is the real distinction. Beautiful outputs are not enough. Product outputs need fidelity.
The Anatomy of a Strong Product Prompt
A strong product photography prompt has five parts:
1. The subject - what the product is, its materials, and the details that matter.
2. The lighting - soft diffused, harder directional, daylight, shadow level.
3. The angle - front, three-quarter, overhead, detail close-up.
4. The background or surface - white seamless, concrete, wood, fabric, commuter setting.
5. The mood - only after the concrete pieces are in place.
Most people write prompts with only the subject. That is why most results look average.
Five Prompt Patterns That Work
Here are the kinds of product prompts that consistently gave us better results:
For a bag:
“Studio product photography, matte black rectangular crossbody bag with flat Velcro front panel, minimalist design, photographed at a three-quarter angle, soft diffused light from the left, warm off-white textured background, sharp focus on stitching and zipper detail, editorial quality”
For clothing:
“Flatlay product photography, handwoven cotton kurta in deep indigo, neatly folded with collar visible, natural morning light from above, placed on raw linen fabric background, warm tones, clean composition, no wrinkles”
For jewellery:
“Macro product photography, gold temple jewellery necklace, placed on dark polished marble surface, single soft spotlight from upper right, reflections visible in marble, extreme close-up showing craftsmanship detail”
For food:
“Restaurant food photography, stainless steel plate with sambar rice and side dishes, photographed from 45-degree angle, natural daylight from window on left, banana leaf underneath the plate, warm South Indian kitchen atmosphere”
For electronics:
“Clean product photography, wireless earbuds in open charging case, placed on matte grey textured surface, overhead flat lay, soft even lighting, no clutter, catalogue style”
The point is not to copy these forever. The point is to notice how concrete they are.
Before and After: The Difference Specificity Makes
Bad prompt:
“A bag on a nice background”
Result: generic. The model filled in too many decisions on its own.
Refined prompt:
“Product photography, matte black urban crossbody bag, flat Velcro front panel, three-quarter angle view, soft natural light from upper left, warm concrete wall background with subtle texture, shallow depth of field on front panel detail, editorial fashion aesthetic, no text or branding”
Result: something close enough to use in actual launch content.
The difference is not artistic talent. It is specificity.
How We Generated Stashed Launch Visuals Before Manufacturing Was Properly Rolling
This is the part that still feels slightly ridiculous in the best way.
We had two physical samples. That was it. They were sitting in our room above the jewellery shop. No studio. No model. No photographer.
We photographed the samples on a plain surface with window light. Functional reference photos, not launch-ready images.
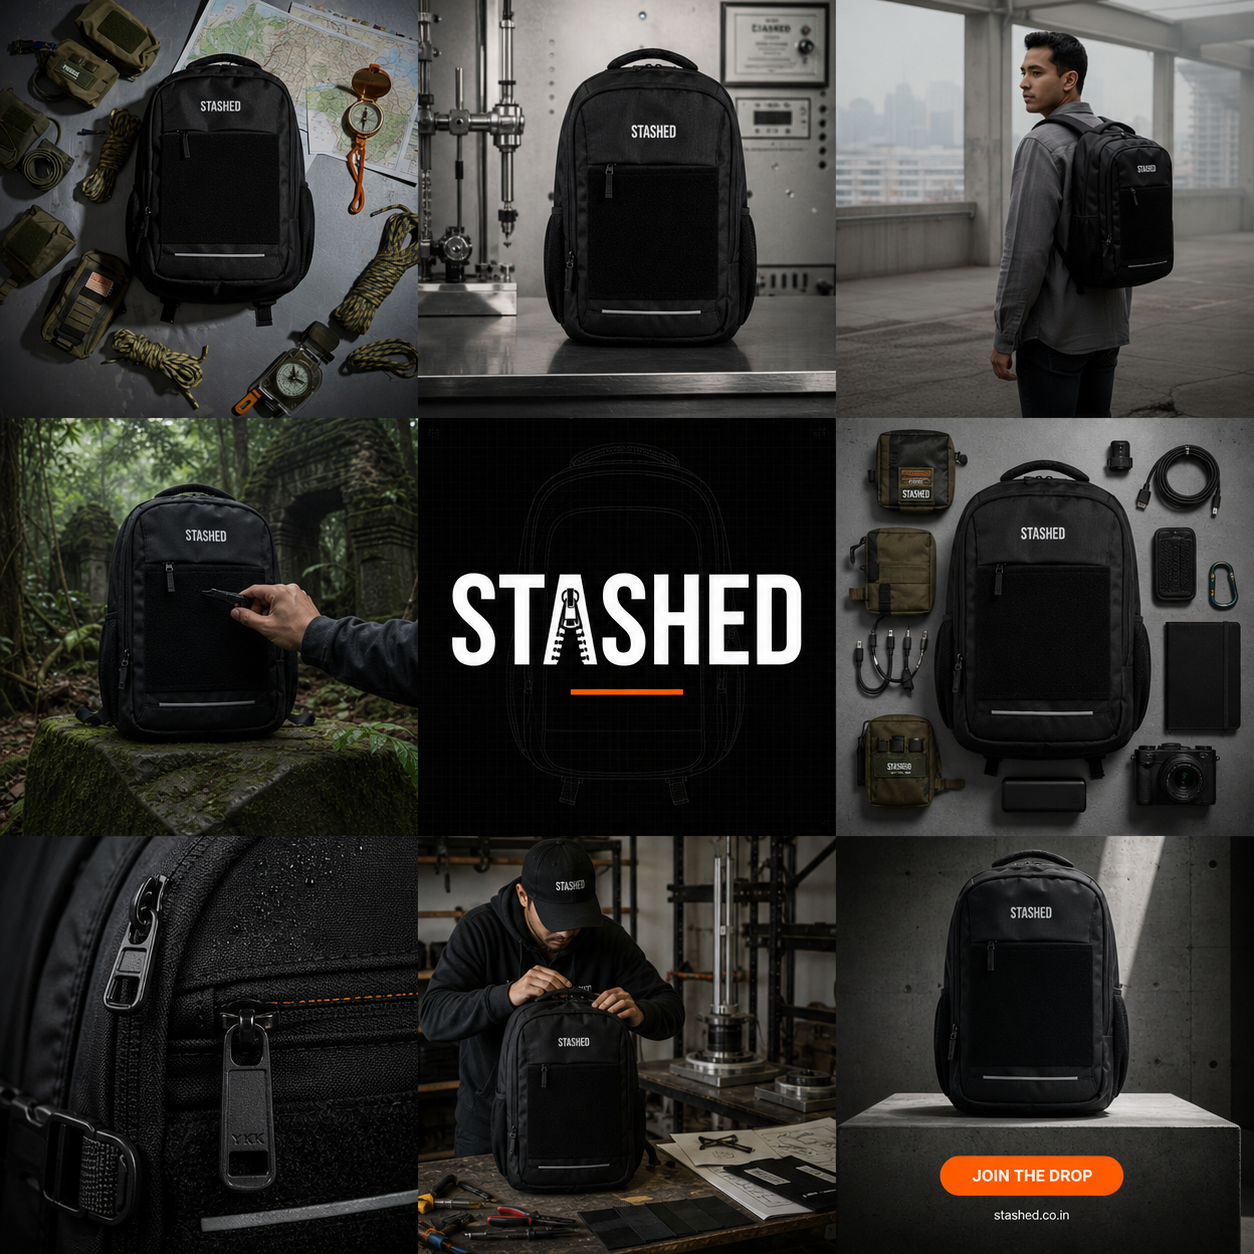
Then we used those references to generate better context scenes: commuter environments, styled product boards, cleaner hero shots. We generated dozens of variations in a couple of hours.
Some were useless. Some were weird. A useful chunk was strong enough to carry pre-launch content.
People started asking where to buy the bag before the full production run was even ready.
That is demand validation. And it came from compressing a visual budget into an afternoon of iteration.
Specificity Beats Creativity
This runs against how most people think about creative tools, but for product work it is true:
Do not try to be poetic with the prompt. Be surgical.
“Luxurious and modern” tells the model almost nothing. “Soft diffused studio lighting, matte black zipper hardware, warm textured backdrop, shallow depth of field” tells it what to build.
Every vague word is a decision you are handing away.
For product work, that is usually a bad trade.
Common Mistakes
Mistake 1: Asking for multiple angles in one prompt. Fix: one prompt, one angle.
Mistake 2: Describing emotional benefit instead of the object. The model cannot photograph “freedom.” It can photograph a bag.
Mistake 3: Forgetting the surface. The table, wall, cloth, or plinth often matters more than the background.
Mistake 4: Not iterating. The first result is rarely the best. The quality comes from the refinement loop.
Mistake 5: Using it before the product is clearly designed. If you do not know what the product should look like, the tool will make too many choices for you.
How to Batch Generate Better Variations
This is the workflow we actually use:
- Write one strong master prompt.
- Pick three variables to test: background, angle, and lighting.
- Generate a set of structured variations.
- Pick the strongest two.
- Make small refinements from there.
It is not magic. It is a system. Systems are faster than inspiration.
The Bigger Picture
Product photography used to be a gatekeeping mechanism. If you did not have the budget for a professional shoot, your product looked unprofessional.
That gate is much smaller now.
What replaced it is a different skill: the ability to write precise, structured prompts and judge the outputs properly. That is learnable. And for small brands, it is now one of the most useful skills you can build.
The brands that figure this out first do not just save money. They move faster. They test more directions. They iterate more often. And that speed compounds.